Quick start
Follow these steps to set up and use MIPI I3C Protocol Exerciser:
Setup steps
1. Select bus
Activate the bus by clicking the left box in the topology dialog.
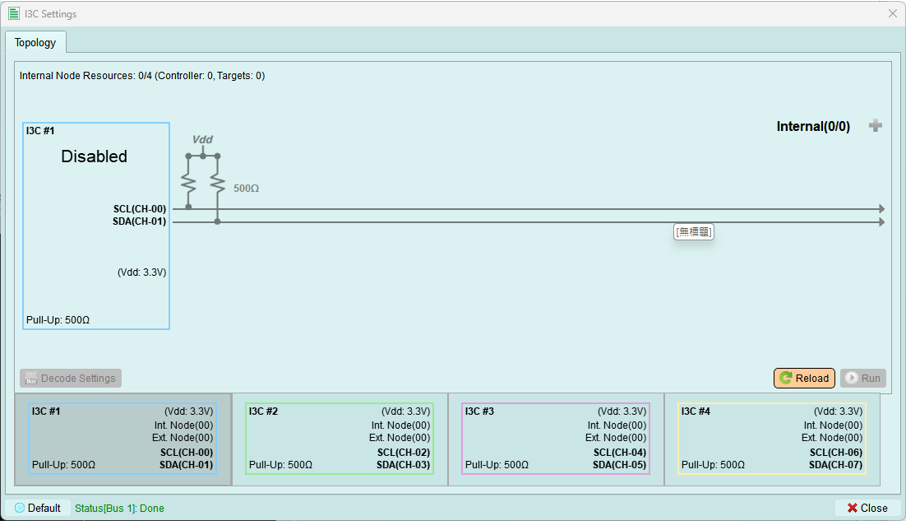
See: Bus Select
2. Configure PX pair parameters
Set up pull-up resistance, Vdd, threshold, and operating mode.
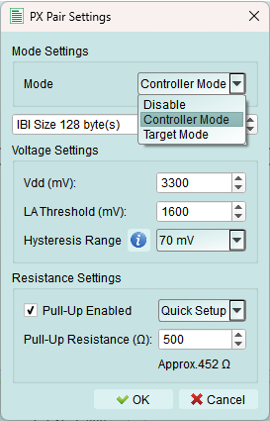
See: PX Pair Settings
3. Controller-specific settings
Note: These settings are only available in Controller mode, not in Target mode.
Configure:
- Address Table - Define I3C and I2C device addresses
- Timing Settings - Adjust I3C timing parameters
4. Configure decode settings
Set up Decode Settings for Logic Analyzer waveform decoding.
This ensures captured I3C signals are properly interpreted.
5. (Optional) Add internal nodes
Create virtual I3C or I2C devices using Internal Nodes.
Use cases:
- Simulate multiple target devices
- Test with mixed I3C and legacy I2C devices
- Verify dynamic address assignment behavior
6. (Optional) Enable DC power supply
Turn on the DC Power Supply to power your device under test.
7. Run
Press Run to activate the exerciser and upload the topology configuration.
What happens:
- Topology is validated
- Settings are uploaded to the device
- Exerciser becomes active on the bus
- Status indicators show progress
8. Send commands (Controller mode only)
Use the MIPI I3C Wizard to send:
- CCC (Common Command Codes)
- Private READ/WRITE transactions
- Legacy I2C transactions
- HDR mode transfers